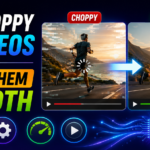
I spent three days generating a travel video with Runway and Pika — 47 clips, color-graded, music synced. When I played it back, it looked like a slideshow with motion blur. Every transition stuttered. The “cinematic AI video” looked like a buffering YouTube clip from 2008.
AI video generation has gotten genuinely impressive — the imagery, the motion, the lighting. What hasn’t kept up is frame count. Most AI video generators produce clips at 8–16 frames per second by default, sometimes lower. That’s why AI videos look “off” even when the visuals themselves are beautiful. Human eyes notice choppiness below about 24fps. At 8fps, motion looks like someone is aggressively clicking through frames manually.
The problem compounds when you edit multiple AI clips together. Each clip was generated independently, potentially at different frame rates, with different motion characteristics. Cutting them together creates a jarring, inconsistent watching experience even before you factor in the low base frame rate.
I’ve been fixing this systematically for the past year across Runway, Pika, Kling, Luma, and Sora outputs. Here’s everything that actually produces smooth results.
Why AI Videos Are Choppy in the First Place
Understanding the cause is half the fix. AI video generation is extraordinarily computationally expensive — generating each frame requires running a massive model, and generating frames at 24fps means running it 24 times per second. To make generation feasible, most tools generate fewer frames and rely on the viewer’s brain to fill in the gaps. Except human brains don’t fill in those gaps — they just perceive the result as choppy.
The specific causes of choppy AI video:
- ›Low base frame rate — AI generates at 8–16fps; smooth video needs 24–60fps
- ›Inconsistent frame timing — gaps between frames aren’t always equal, creating an uneven rhythm
- ›Motion blur absence — real cameras add natural motion blur; AI-generated frames often don’t, making motion look staccato
- ›Export codec mismatch — encoding AI footage in the wrong codec makes it choppier during playback
- ›Playback device limitations — sometimes the video is fine but the device playing it can’t decode it smoothly
- ›Editing software mismatched timeline FPS — editing 8fps clips in a 30fps timeline adds artificial choppiness
Frame interpolation — generating new in-between frames using AI to smooth the motion — is the most impactful single fix for choppy AI video. Going from 8fps to 24fps using RIFE interpolation takes minutes and transforms unwatchable footage into something cinematic. This is where to start before anything else.
The Fixes — Start From the Top
RIFE (Real-time Intermediate Flow Estimation) is an AI algorithm specifically designed to generate smooth in-between frames. You give it your choppy 8fps video and it analyzes the motion between existing frames, generates new frames that logically fit in between, and outputs a smooth 24, 30, or 60fps version. The results are remarkably good on AI video footage because the motion in AI clips tends to be smooth and consistent — RIFE handles it well.
The best tools for RIFE interpolation:
- Topaz Video AI — the best quality, one-time purchase (~$199), desktop app. Batch process multiple clips. Their “Apollo” model handles AI footage especially well
- DaVinci Resolve (free) — has built-in optical flow speed change and frame blending that achieves similar results. Effects → Retime and Scaling → Optical Flow
- Flowframes (free, open source) — dedicated RIFE interpolation app for Windows. Set input FPS to your AI video’s actual frame rate, output to 24 or 30fps
- CapCut (mobile — free) — has a “smooth” frame interpolation option when you slow down a clip. Apply 0.5x slow motion with optical flow to effectively double the frame count
Most AI video tools now offer frame rate options — but they’re often not the default setting. Before generating, always check the output settings and set the highest frame rate available. Runway Gen-3, Kling, and Luma all offer 24fps or higher options that produce dramatically smoother base footage than their default low-fps outputs.
- Runway Gen-3: When creating a generation, look for the FPS option in advanced settings — set to 24fps if available
- Kling AI: Professional mode offers higher quality output — use this rather than standard mode for any footage that will appear in a final edit
- Luma Dream Machine: Generation quality significantly affects smoothness — use the highest quality option even if it takes longer
- Pika Labs: Check the FPS slider in generation settings — default is often low
- Higher FPS generation uses more credits/compute — worth it for the base quality improvement
Real-world cameras naturally capture motion blur — the slight smearing of moving subjects between frames that makes motion look fluid. AI video generators often produce razor-sharp frames without this blur, which makes motion look staccato even at reasonable frame rates. Adding subtle motion blur in post makes the footage read as more natural.
- DaVinci Resolve (free): Select the AI clip → Effects Library → Resolve FX → Motion Blur → adjust intensity to 0.3–0.5 (subtle is better than obvious)
- CapCut (free): Select clip → Effects → Video Effects → Blur → Motion Blur → adjust
- Premiere Pro: Effects → Video Effects → Blur & Sharpen → Camera Blur (use sparingly — 2–5%)
- Key rule: motion blur should be barely perceptible. If you can clearly see the blur, it’s too much and will look artificial in the opposite direction
AI-generated footage is often delivered as H.265 (HEVC) or WebM files. When you edit these and re-export using the wrong settings, the result looks choppier than the source footage. The correct export chain preserves quality without adding encoding artifacts that read as choppiness.
- Timeline frame rate: Match your editing timeline FPS exactly to your interpolated footage FPS. If you interpolated to 24fps, set your timeline to 24fps — not 30fps
- Export codec: H.264 for general use (YouTube, Instagram, sharing). ProRes 422 if you’re delivering to another editor or doing further post-production
- Bitrate: 10–15 Mbps for 1080p, 25–35 Mbps for 4K. Lower bitrates create compression artifacts that look like jitter, especially on motion-heavy AI footage
- Frame rate export match: Whatever your timeline FPS is, export at exactly the same FPS — never let the export settings “interpret” or convert the frame rate
This is a subtle but significant cause of added choppiness. If your AI clips are at 12fps and you drop them into a 30fps timeline, the editing software has to decide how to display 12 frames in 30 frame slots — it repeats frames, creating a stuttering effect that’s separate from (and in addition to) the original low frame rate. Before doing anything else with your footage, set your timeline FPS to match your source clips.
- DaVinci Resolve: New Project → Timeline → Framerate → match exactly to your AI footage
- Premiere Pro: New Sequence → Settings → Timebase → set to footage frame rate
- CapCut: Project settings → Frame rate → match to source
- Then either export at that frame rate (if acceptable) or interpolate up to your target FPS before changing the timeline setting
“The footage isn’t broken — it just needs the frames that were never there in the first place. RIFE creates them in minutes.”
This is the workaround that cinematographers have known for decades: if your footage is choppy because it’s low frame rate, slow it down. When 8fps footage plays at 50% speed, it looks like deliberately artsy slow motion rather than choppy video. The choppiness becomes part of the aesthetic rather than a flaw — especially with AI video’s dreamlike quality.
- In your editor, right-click the AI clip → Speed → 40–60% of original speed
- Apply optical flow retiming if available — this interpolates smoothly during the slowdown
- Works best with: landscape footage, abstract AI clips, anything without fast-moving subjects
- Doesn’t work well with: AI clips containing speech (slowed audio is obvious) or clips where you need specific timing
Choppiness is most obvious when there’s motion happening. Static moments in AI video look fine — it’s during camera movement, subject movement, or transitions that low FPS becomes visible. Editing technique can disguise this by cutting away from clips at the moment movement starts, before the low frame rate becomes perceptible.
- Review each AI clip and note where motion starts (camera pan, subject movement, etc.)
- Set your out-point to one or two frames before that motion starts
- Cut to a static or slow-moving clip next, then back to motion in a new clip — the cut resets the viewer’s frame of reference
- Avoid long unbroken holds on moving AI footage at low frame rates — this is where choppiness is most obvious
Hard cuts between AI clips with different motion characteristics are immediately jarring. A short cross-dissolve (8–12 frames long) creates a smooth bridge between clips that disguises both the frame rate inconsistency and any slight visual mismatch between adjacent clips. Most AI video compilations that look polished use short dissolves rather than hard cuts.
- In your editor, select the edit point between two AI clips
- Apply a Cross Dissolve (or Dip to Black → up, for a more cinematic feel)
- Set the dissolve length to 8–12 frames (at 24fps that’s 0.3–0.5 seconds)
- Shorter dissolves look more intentional; longer ones can look like lazy editing
Before spending time fixing your video, confirm the choppiness is actually in the file — not in how it’s being played. Some devices and video players struggle with specific codecs or resolutions, displaying choppy playback even when the video file itself is perfectly smooth.
- Upload the video to YouTube (unlisted) and play it back — YouTube normalizes playback. If it’s smooth on YouTube, the file is fine and your local player is the problem
- Try playing in VLC (free, cross-platform) — VLC handles more codecs than most native players and gives a more accurate representation of actual video quality
- On mobile: if the video plays choppy in the Gallery app, try VLC for Android/iOS — many gallery apps struggle with H.265 or high-bitrate files
- If it’s smooth in VLC but choppy elsewhere: the file is fine, the player is the issue
If your AI video is in H.265/HEVC format and playing choppy on certain devices, transcoding to H.264 usually fixes playback choppiness because H.264 is hardware-decoded on virtually every modern device while H.265 support is less universal on budget hardware.
- Download and install HandBrake (free, Windows/Mac/Linux)
- Open your AI video file in HandBrake
- Presets → General → H.264 1080p30 (or match your source resolution)
- Keep the same frame rate as source, set quality to RF 18–22
- Click Start Encode — the output file will play smoothly on almost any device
Best Tools for Smoothing AI Videos
| Tool | What It Does | Cost | Best For |
|---|---|---|---|
| Topaz Video AI | Frame interpolation, upscaling, enhancement | ~$199 | Professional results, batch processing |
| Flowframes | RIFE interpolation, multiple models | Free | Best free interpolation option |
| DaVinci Resolve | Optical flow, motion blur, full editing | Free | All-in-one editing + smoothing |
| CapCut (desktop) | Frame blending, optical flow slow motion | Free | Quick mobile-friendly workflow |
| HandBrake | Transcoding to H.264 | Free | Fixing playback codec issues |
Complete Smoothing Workflow — From Raw AI Clip to Finished
Mistakes That Keep Videos Looking Choppy
Higher frame rates aren’t always better for AI video. Many AI-generated clips have a deliberately dreamlike, slightly ethereal quality that works at 24fps and looks wrong at 60fps — the “soap opera effect” where motion looks too real and clinical. For most cinematic AI video content, 24fps is the target. Only interpolate to 60fps for footage specifically designed for smooth motion like sports or product showcases.
RIFE interpolation works by analyzing the optical flow between frames and generating in-between frames based on what it predicts should be there. On clips with complex, fast, or unpredictable motion — people dancing, detailed crowd scenes, fast camera pans — interpolation can generate incorrect frames that look wrong in an animated, glitchy way. Reduce interpolation intensity or skip interpolation entirely on these clips.
Dropping 24fps interpolated clips into a 60fps timeline causes the editor to display each frame 2.5 times, creating an uneven stuttering that’s different from (and often worse than) the original choppiness. Always match your timeline frame rate to your footage frame rate, or convert to the target FPS before editing.
Interpolation significantly improves choppy AI footage but it can’t create detail that was never there. If your AI generation has major quality issues — inconsistent motion direction, flickering textures, physics errors — interpolation will smooth the temporal issues but won’t fix the spatial quality problems. Some footage genuinely needs to be regenerated at higher quality settings rather than fixed in post.
What Fixed That Travel Video
Going back to the 47-clip project from the beginning. The fix was a two-step process: ran every clip through Flowframes at 2x interpolation (from ~8fps to ~16fps, then a second pass to ~30fps), and set the editing timeline to exactly 30fps before reassembling the edit.
The dissolve transitions made a bigger visual difference than I expected — they transformed what felt like a choppy montage into something that read as deliberately cinematic. The final export used H.264 at 15 Mbps and plays back smoothly on every device it’s been shown on.
Total processing time: about 90 minutes for Flowframes to process all 47 clips. I let it run overnight. The editing time in the smoother-timeline edit was actually faster than the original because the visual consistency made decisions easier.
Start with Flowframes (free) to interpolate your AI footage from whatever frame rate it was generated at up to 24fps. Set your editing timeline to match. Use cross-dissolve transitions between clips. Add subtle motion blur at 0.3 intensity. Export as H.264 at 10–15 Mbps at your timeline frame rate. Test in VLC before posting. That workflow converts choppy AI-generated footage into something smooth enough to use professionally — without spending money on tools, and without regenerating any of the original footage.