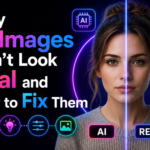
My friend spent $250 on a professional headshot session and hated every single photo. I spent forty minutes with an AI prompt and got her something she actually uses. Here’s the exact wording.
Professional headshots are one of those things people put off forever. Either the cost of a real photographer feels hard to justify, or they’ve had a session that produced twelve photos they never used, or they just don’t feel comfortable in front of a camera. My friend falls into the third category — she’s a project manager who’d been using a cropped birthday photo as her LinkedIn profile picture for three years.
After her company started a push to improve their LinkedIn presence, she finally got a professional shoot done. $250, two hours, nice studio. She came back with photos that looked technically fine but felt stiff and corporate in a way that wasn’t really her. She used one reluctantly and felt vaguely embarrassed every time someone clicked her profile.
Two weeks later I helped her generate a headshot using Midjourney, spent about forty minutes on prompt refinement, and she switched to it immediately. Several colleagues asked who she’d used for the photo. She’s still using it.
Here’s exactly how to do this properly — because vague prompts produce vague results, and LinkedIn headshots specifically have requirements that make them different from other portrait prompts.
Why LinkedIn Headshots Need Their Own Prompting Approach
LinkedIn profile photos operate under different visual rules than other portrait contexts. They appear at very small sizes (as small as 48×48px in some views) and need to communicate professionalism, approachability, and credibility all at once — in a thumbnail.
That means several things need to be true simultaneously:
The face must be large in the frame. Full-body shots don’t work — the face needs to occupy at least 60% of the image. The background must be clean and non-distracting. The expression needs to be warm but not casual. The lighting must be professional without being obviously studio-staged. And the clothing has to fit the industry — what reads as “professional” for a creative director is completely different from what reads as professional for a corporate lawyer.
Most people ignore half of these when prompting AI headshots and wonder why the result looks slightly off. The prompt has to address all of them.
LinkedIn headshots are judged at thumbnail size first. If your generated image only looks good when zoomed in, it won’t work. Always check your output at small scale — roughly 200×200px — before deciding it’s usable.
The Prompts That Actually Work

“A LinkedIn headshot has three seconds to communicate: trustworthy, competent, and human. The prompt has to specify all three.”
Industry-by-Industry: What Changes in the Prompt
| Industry | Background | Clothing Cue | Expression Tone |
|---|---|---|---|
| Finance / Law | Neutral grey or dark gradient | Formal suit, subtle tie | Confident, composed, serious warmth |
| Tech / Product | Blurred modern office | Smart casual blazer, no tie | Approachable, direct, relaxed |
| Healthcare | Soft white or pale blue | Clean blazer, clinical adjacent | Warm, trustworthy, genuine smile |
| Creative / Marketing | Textured wall, natural setting | Smart casual, personality showing | Engaged, creative energy, natural |
| Executive / C-Suite | Dark gradient, premium studio | Dark formal suit, no tie optional | Authoritative, composed, assured |
| Education / NGO | Soft neutral or outdoor natural | Smart but accessible, no suit required | Open, approachable, purposeful |
| Consulting | Clean white or light gradient | Business formal or smart blazer | Confident, solutions-focused |
Which Tools to Use
Best overall for lighting quality and background rendering. The –stylize parameter is important for headshots — keep it between 75–150. Too low and it looks flat; too high and it drifts artistic. Use –ar 1:1 for square LinkedIn crop. The face detail at v6 is genuinely impressive when you specify a realistic photography style anchor like “Canon 5D Mark IV” or “Sony A7R V look.” Run 4 variations and upscale the best one.
Better than Midjourney for warm, expressive faces and natural smiles — which matters a lot for approachable industries like healthcare, education, and non-profits. The downside is less control over lighting and background detail. Use it specifically when the expression quality matters more than the environmental detail. DALL-E 3 also follows prompt specifications more literally, which helps when you need something very specific.
The safest option for commercial use — all Firefly outputs are cleared for commercial licensing. Skin tone accuracy has improved dramatically in 2025–26 and it now handles South Asian and darker skin tones better than most competitors. If the headshot is for a business context where IP clarity matters, Firefly is the one to use. The “Reference Image” feature lets you upload a rough selfie as a style anchor, which significantly improves accuracy of features and expression.
Aragon is purpose-built specifically for professional headshots and it shows. You upload 12–15 selfies of yourself, it trains a model on your face, and generates headshots that actually look like you — not a generic person. This is the key advantage over the other tools: realistic likeness. The prompting is done via their interface rather than open-ended text, which limits control but dramatically increases consistency. If personal resemblance is the priority, Aragon is worth the one-time cost.
Mobile-first tools that also train on your selfies and generate headshots directly. Remini is more consumer-facing; HeadshotPro sits closer to the professional market. Both produce decent results for the price point. The output quality doesn’t match Midjourney for environmental detail, but for someone who just wants their own face in a professional context without writing prompts, these are the most accessible entry points.
Step-by-Step: From Prompt to LinkedIn Profile
Know your industry, your seniority level, and the tone you want to project. “Professional” means something different for a startup founder versus a corporate lawyer. Your prompt needs to reflect that difference explicitly — don’t leave it for the AI to decide.
Follow this order every time. Start with who the person is (age, gender, ethnicity for accuracy), then what they’re wearing, then environment, then lighting character, then expression, then how the shot is framed, then the photography style reference. Missing any of these produces a generic output.
“Canon 5D Mark IV portrait look” or “Sony A7 IV headshot” — these references consistently improve photorealism because they pull the AI toward known professional photography aesthetics. It’s a small addition that makes a visible difference.
One bad output doesn’t mean the prompt is wrong — AI generation has variance. Run the full grid in Midjourney (4 at once), check all four, and only adjust the prompt if all four have the same problem. If one of the four is close to right, use the Vary (Subtle) option to refine it rather than rewriting from scratch.
Resize your browser window or zoom out until the image is roughly 200×200px. Does the face read clearly? Is the expression visible? Is the background clean enough? If it works at small size, proceed. If not, the issue is usually framing — the face isn’t large enough in the frame.
LinkedIn compresses uploaded images — the higher your starting resolution, the better the final quality after compression. Use Midjourney’s built-in upscaler, or run through Topaz Photo AI / Upscayl (free) for sharper results. LinkedIn recommends at minimum 400×400px but uploading at 1000×1000 gives noticeably better results after their compression.
Mistakes That Make AI Headshots Look Fake
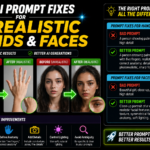
Prompting “professional woman” without specifying age range, ethnicity, or features hands all those decisions to the AI — which defaults to whatever its training data skewed toward. The result is someone generic. Be specific: “South Asian woman in her early thirties, warm brown skin, dark hair pulled back professionally.” Specificity produces identity, and identity is what makes a headshot feel real.
“Confident expression” is one of the most over-used and least useful descriptors in portrait prompting. It produces a slightly smug look in about 70% of generations. Instead try: “genuine slight smile, warm and approachable, direct eye contact, natural not posed.” These combinations produce expressions that read human rather than stock photo.
Without a ratio specification, Midjourney defaults to a slightly landscape orientation that crops badly into a square for LinkedIn. Always add –ar 1:1 for square crop, or –ar 4:5 if you want a portrait orientation that still works at LinkedIn’s thumbnail display. Getting the crop wrong means cropping the image yourself afterward and often losing important composition.
AI-generated faces occasionally have subtle issues — a slightly asymmetric smile, one eye slightly different from the other, unnatural teeth rendering. These don’t show at thumbnail size but become obvious if a recruiter or client clicks through to your full profile. Always zoom to 100% and check the face in detail before uploading. Reject anything with visible anatomy inconsistencies.
Using an AI-generated image that looks like you (via tools like Aragon that train on your photos) is broadly accepted. Using a completely synthetic person who doesn’t resemble you at all raises authenticity questions — particularly in professional contexts where people will meet you in person or on video calls. For LinkedIn specifically, the best approach is a generated image that represents your general appearance and demographic, even if it’s not a perfect likeness.
What My Friend Actually Ended Up Using
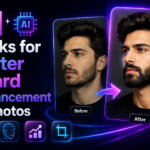
We ran four versions using the corporate prompt above with adjustments for her industry (project management, tech-adjacent). The winning image used a blurred office interior background, soft window light, and a “genuine slight smile, direct eye contact” expression specification. Three colours in the image — her navy blazer, the warm office background, and a neutral skin tone — created a clean, professional palette that worked perfectly at small sizes.
The image we used wasn’t the most technically impressive of the four generations. It was the one where the expression looked the most like her — or at least, the most like how she’d want to come across professionally. That distinction matters.
Her profile connection requests went up in the month after switching. She can’t attribute that entirely to the photo, but something changed. People started commenting that her profile looked “really polished.” She still hasn’t told anyone the headshot is AI-generated.
I always start with the Corporate or Tech prompt above as a base, swap in the correct demographic details, adjust the background for the industry using the table above, and generate one round of four. If none of the four are close, I change one element — usually the lighting description or expression language — and run again. In most cases, something usable comes out of the first or second round.
Start with the prompt closest to your industry from the list above. Fill in the demographic details accurately. Add a camera reference at the end. Generate at least four variations before deciding the direction is wrong. Check at thumbnail size. Upscale to 1000×1000 before uploading. The whole process takes 30–45 minutes the first time, and about 15 minutes once you have a prompt that works for your context. Save your winning prompt — you’ll want it again in six months when LinkedIn decides it’s time for a new photo.